How to Install and Configure Bind 9 (DNS Server) on Ubuntu / Debian System LaptrinhX
Next, install the BIND9 package: sudo apt install bind9 dnsutils. The dnsutils package provides tools for testing and troubleshooting the DNS server. Step 2: Configuring BIND. Edit the main configuration file named named.conf.options to specify which clients are allowed to query your server: sudo nano /etc/bind/named.conf.options
Install BIND 9 on Ubuntu and Configure It for Usage Linux Hint
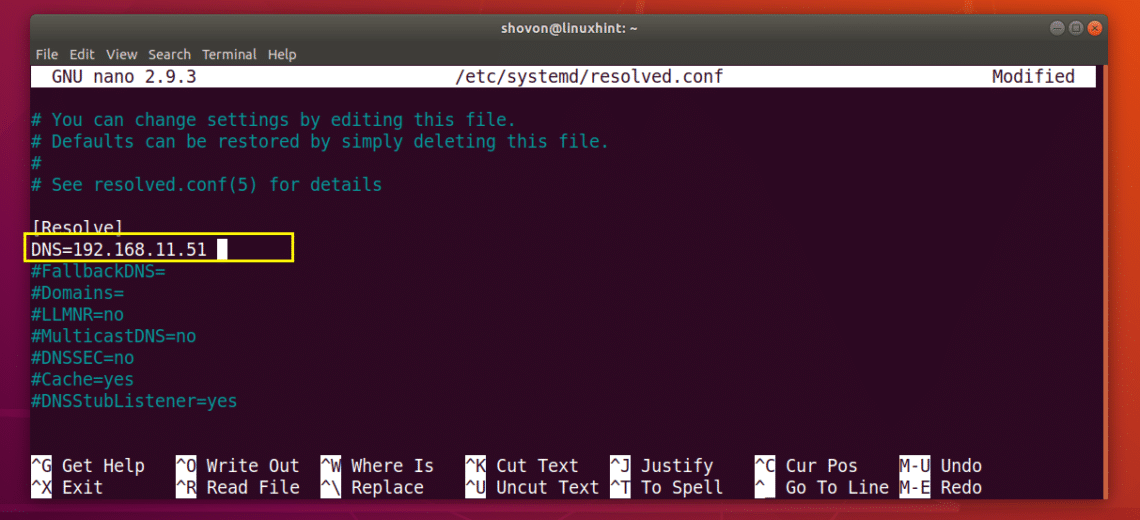
Then, edit the reverse lookup zone file: Make the following changes: Save and close the file. Then, edit /etc/resolv.conf file and define your DNS server: Add your DNS server domain and IP as shown below: Save and close the file. Then, restart the Bind DNS service to apply the changes:

Install and Configure BIND9 DNS server on Oracle Linux 9 Step by Step YouTube
Install dan Konfigurasi BIND9. Jika ketiga point diatas sudah terpenuhi, maka selanjutnya anda tinggal melakukan langkah-langkah cara install dan konfigurasi BIND di server Ubuntu berikut ini : Login kedalam server anda dan silahkan install BIND dengan perintah : apt-get install bind9.

How To Install and Configure DNS (Bind9) on Ubuntu 22.04 Server » TechnologyRSS
Berikut ini adalah tutorial Cara Install Bind9 Pada Debian atau Ubuntu Mengkonfigurasi server DNS untuk resolve nama domain atau alamat IP. BIND menggunakan port 53/TCP,UDP. Pengertian BIND9 atau Berkeley Internet Name Domain Versi 9 adalah salah satu software yang biasa digunakan untuk membuat, membangun dan mengatur sebuah DNS (Domain Name Server) pada sistem operasi Linux.

√ Cara Install dan Konfigurasi DNS Server (bind9) di Debian 9 Mas Ulin
BIND9 configuration. The DNS server works right after installation. You need to configure it according to your usage purposes. First, allow BIND9 to work through the firewall. sudo ufw allow Bind9. The main configuration file is named.conf.options, let's open it. sudo nano /etc/bind/named.conf.options.
How to Install and Configure Bind 9 (DNS Server) on Ubuntu / Debian System LaptrinhX
Run the following command to install BIND 9 on Ubuntu 22.04/20.04, from the default repository. BIND 9 is the current version and BIND 10 is a dead project. sudo apt update sudo apt install bind9 bind9utils bind9-dnsutils bind9-doc bind9-host. Check version. named -v. Sample output: BIND 9.16.1-Ubuntu (Stable Release)

TUTORIAL INSTALL BIND9 DNS SERVER UBUNTU SERVER 12.04 VIRTUALBOX YouTube
Pada postingan ini kita akan melakukan instalasi dan konfigurasi DNS Server menggunakan BIND 9 pada Ubuntu Server 20.04 LTS. Install. Sebelum melakukan instalasi paket aplikasi terlebih dahulu lakukan update dan upgrade sistem. $ sudo apt update && sudo apt upgrade. Paket bind9 dapat di install melalui command berikut. $ sudo apt install bind9

Install dan Konfigurasi DNS dengan BIND9 di Server Ubuntu Pemsemu
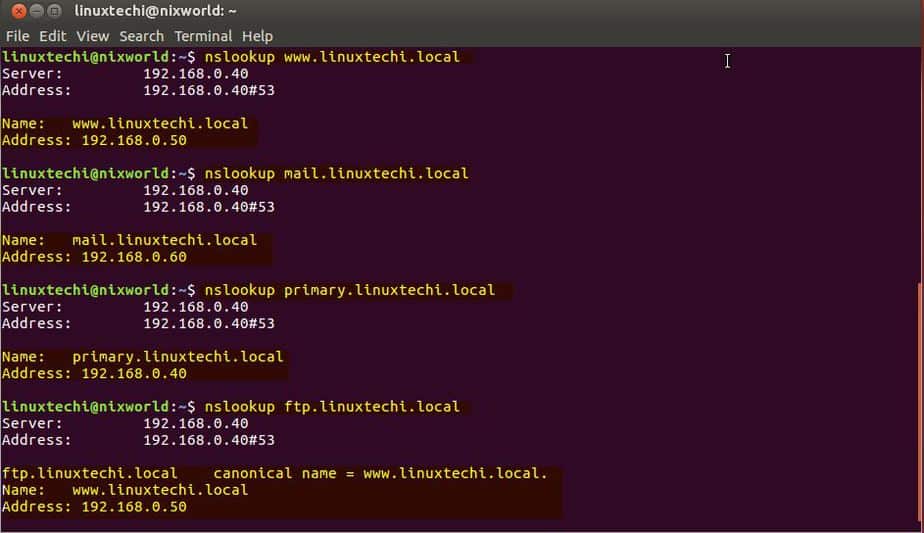
Step 2 — Configuring the Primary DNS Server. BIND's configuration consists of multiple files that are included from the main configuration file, named.conf. These file names begin with named because that is the name of the process that BIND runs (with named being short for " name d aemon", as in "domain name daemon").

Cara Install Bind 9 Dengan Mudah Dan Simple Berbagi Cara Tutorial
Luckily, the secondary DNS server is much easier to configure. On ns2, edit the named.conf.options file: sudo nano /etc/bind/named.conf.options. At the top of the file, add the ACL with the private IP addresses of all of your trusted servers: /etc/bind/named.conf.options — updated 1 of 2 (secondary) acl "trusted" {.

Tutorial cara install webserver virtualhost (bind9, apache2) Debian 8 Jessie YouTube
Update ubuntu repository and install Bind using apt-get. apt-get update apt-get install bind9 Step2. Configure bind options *)do this if you haven't installed nano text editor: apt-get install nano nano /etc/bind/named.conf.options options { directory "/var/cache/bind"; additional-from-auth no; additional-from-cache no; version "Bind Server.

CARA INSTAL BIND9 DNS SERVER UBUNTU SERVER 12.04 DI VIRTUALBOX YouTube
Ditutorial kali ini kita akan membahas cara membuat DNS (DOMAIN NAME SERVER) Server dengan bind9, distro Linux yang kita gunakan adalah Ubuntu 20.04. Penggunaan memory untuk DNS server bisa dibilang ramah memory, untuk DNS Server yang saya kelola saya menggunakan 1 GB memory, maksimum memory yang digunakan 200 MB untuk 100 Domain.

Tutorial cara Install dns server bind9 debian 8 (jessie) YouTube
sudo systemctl restart bind9. Then allow DNS connections to the server by altering the UFW firewall rules: sudo ufw allow Bind9. With that, you now have primary and secondary DNS servers for private network name and IP address resolution. Now you must configure your client servers to use your private DNS servers.
Install BIND 9 on Ubuntu and Configure It for Usage Linux Hint
3 Konfigurasi Bind9 sebagai DNS Server di Linux. 3.1 Step 1. Membuat Private Nameserver. 3.2 Step 2. Cara Install Bind9 di Linux. 4 Pengujian. Namun sebelum kami bahas tentang cara konfigurasinya, kami akan mengulas sedikit tentang apa itu bind9 dan manfaatnya.

How To Install DNS Server (Bind9) On Ubuntu 20.04 YouTube
This is achieved by executing the below command. sudo apt update -y. Then proceed and install the BIND DNS server. The name for this DNS server in Debian is bind9 and is available in the default base repository. Install it using the APT command as below. sudo apt-get install -y bind9 bind9utils bind9-doc dnsutils.

TUTORIAL INSTAL BIND9 DI UBUNTU SERVER YouTube
1. Choosing a version. We support three major branches of BIND 9 at a time: Stable, Extended-Support, and Development. See this advice: Which version of BIND do I want to download and install? as well as our list of supported platforms. We also maintain a significant feature matrix and changes file. If you would prefer a GUI management interface, you might consider a Commercial Product based.
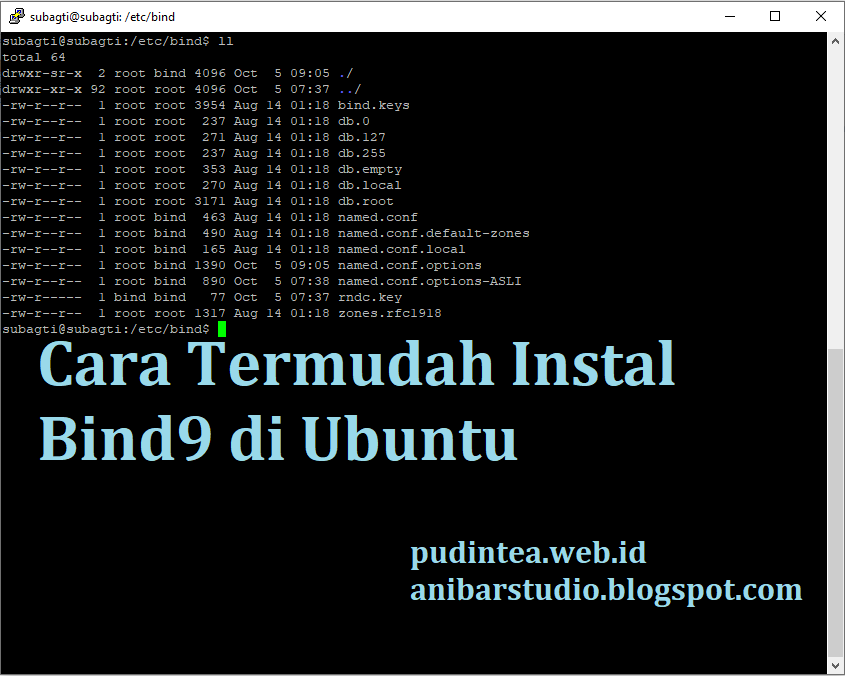
Cara Termudah Instal Bind9 di Ubuntu Membuat server DNS Resolver Anibar Studio Anibar Studio
First, let's start by updating the apt package manager. sudo apt update. The Bind DNS package can be found in the Debian 12 default repositories. Run beneath apt command to install bind9 package. sudo apt install bind9. Use the following command to confirm the Bind 9 version after installation: sudo named -v.