
Chasing LED Lights With Arduino Code YouTube
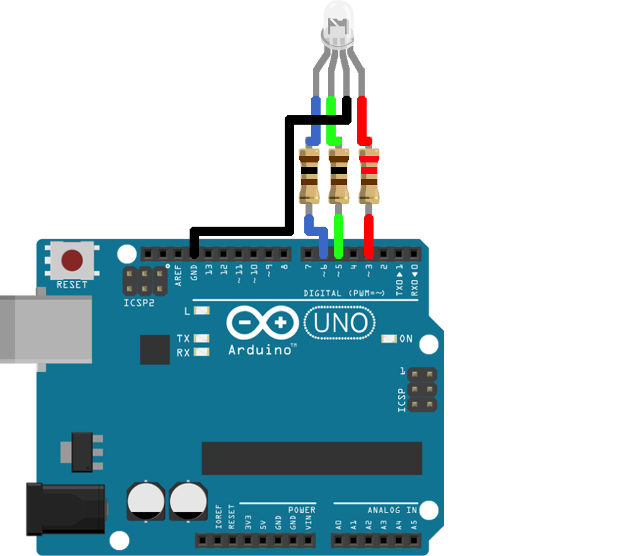
Negative terminal of all LEDS to GND of Arduino. Positive Terminal: Led1 : 2 Led2 : 3 Led3 : 4 Led4 : 5 Led5 : 6 Led6 : 7 Led7 : 8 Led8 : 9 Led9 : 10 Led10 : 11 You can use the image.

How to drive RGB LEDs with ESP32 & ESP8266 NotEnoughTech
Usually, the LED's shortest lead connects to the ground side. If you connect the LED to pin 13 as shown in the image below, you can use the same code we used above to make the LED flash on and off. Changing the Pin. If you want to use a different pin to power the LED, it's easy to change it. For example, say you want to use pin 8 instead of.
Arduino rgb led adviserfiln
Step 1: Materials. -8 x Led (I used 3V Leds because i didnt have 5v ones) -Arduino. -Breadboard. -Jumper Wires. Optional: -Prototyping Shield.

Running Led Circuit Diagram Pdf
FastLED is a fast, efficient, easy-to-use Arduino library for programming addressable LED strips and pixels such as WS2810, WS2811, LPD8806, Neopixel and more. FastLED is used by thousands of developers, in countless art and hobby projects, and in numerous commercial products. We build FastLED to help you get started faster, develop your code.

RANGKAIAN RUNNING LED MENGGUNAKAN ARDUINO Syarif Projects
Step 3: Arduino Programming. Next thing is to write a program for Arduino. First we define delay value outside any loop, that value will be the same through the program. Then we define PINs 2-13 as Outputs. First For loop turn on the LEDs with the delay value between turning on the next LED. Second For loop turns off the LEDs in the opposite order.
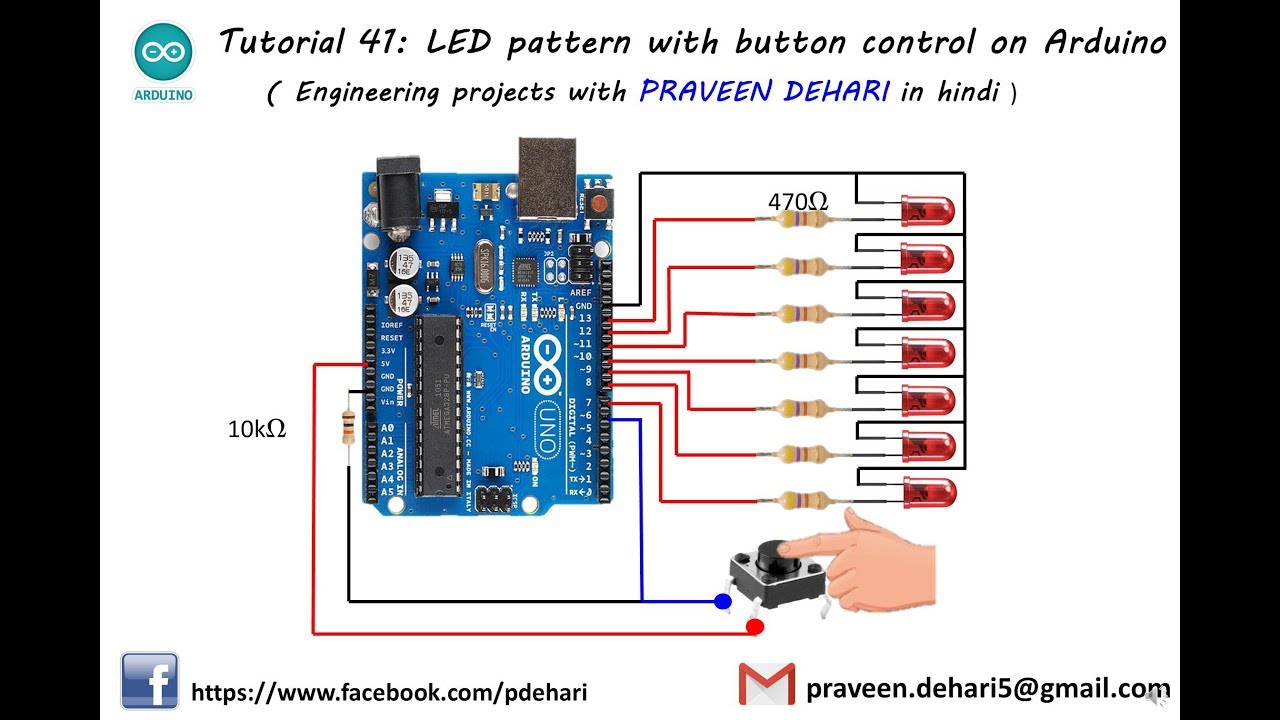
LED pattern with button control on Arduino Tutorial 41 YouTube
Step 1: Include the FastLED Library. The first step in writing our sketch is to include the FastLED library. This will allow us to use a variety of functions written specifically for controlling LED strips that aren't a part of the standard Arduino IDE.

Cara Mudah Membuat Running Text dengan Modul Led Matrix 8x8 Max7219 YouTube
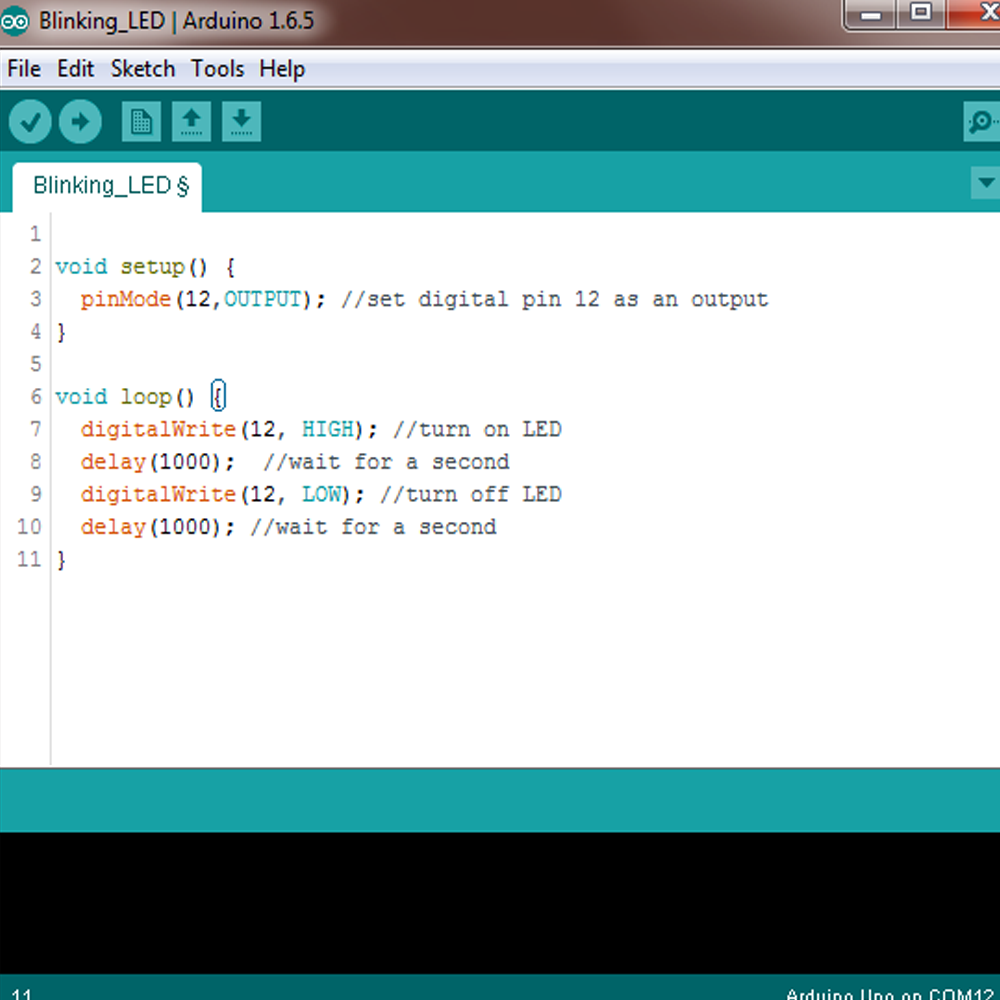
Code to make the LED flash on/off: After the microcontroller board is plugged into the computer and the LED is on the board itself, we need to write some simple code to make the LED blink. // the setup function runs once when you press reset or power the board. void setup() {. // initialize digital pin LED_BUILTIN as an output.

Arduino chaser lights with code! Running Light YouTube
Running LED Basic Arduino TutorialThis is a simple tutorial about how to connect and to program 12 LEDs with Arduino UNO to create a nice light effect.Vrlo.

Tutorial Arduino Simulasi Running LED Proteus 8
1. Configuration: Here you can find buttons such as Power (to turn the lights on or off), Timer (to organize the lights to come on and off at certain points during the day), Sync (to sync multiple WLED devices across your network), Peek (to see an animation preview of your lights), Config (to configure the number of LEDs and the GPIO port), and a Brightness slider (to control the overall.
Vino Technology [Arduino] Jam digital dan running text dengan LED Max7219
In this PIC programming tutorial I will demonstrates how to blink a LED, create a running LEDs and set individual bits on a register using the XC8 compiler w.

Arduino for beginners Array with LED running lights
The loop() function is the heart of an Arduino program. After the setup() function is executed, the loop() function starts running repeatedly until the Arduino is powered off or reset. It contains the main code that performs the desired tasks, controls the board, user input. Whatever is included in the loop() function will be executed in a continuous loop, allowing the Arduino to perform its.

Running LED Tutorial using Circuit Wizard YouTube
Build the circuit. Here is the circuit. How to build the circuit: First make sure that the Arduino is powered off (no USB cable plugged to anything). Check the LED, you will see that one of the leg is shorter than the other one. Plug the shorter leg of the LED to a hole on the breadboard.

Cara membuat rangkaian Running LED (Led Berjalan) dg Software Proteus 8 menggunakan IC 555 & IC
This tutorial teaches you to control LED using Arduino UNO or Genuino UNO. It can apply to control ON/OFF any devices/machines. The detail instruction, code, wiring diagram, video tutorial, line-by-line code explanation are provided to help you quickly get started with Arduino.
Arduino LED Blinking Tutorial 2 MakerStream
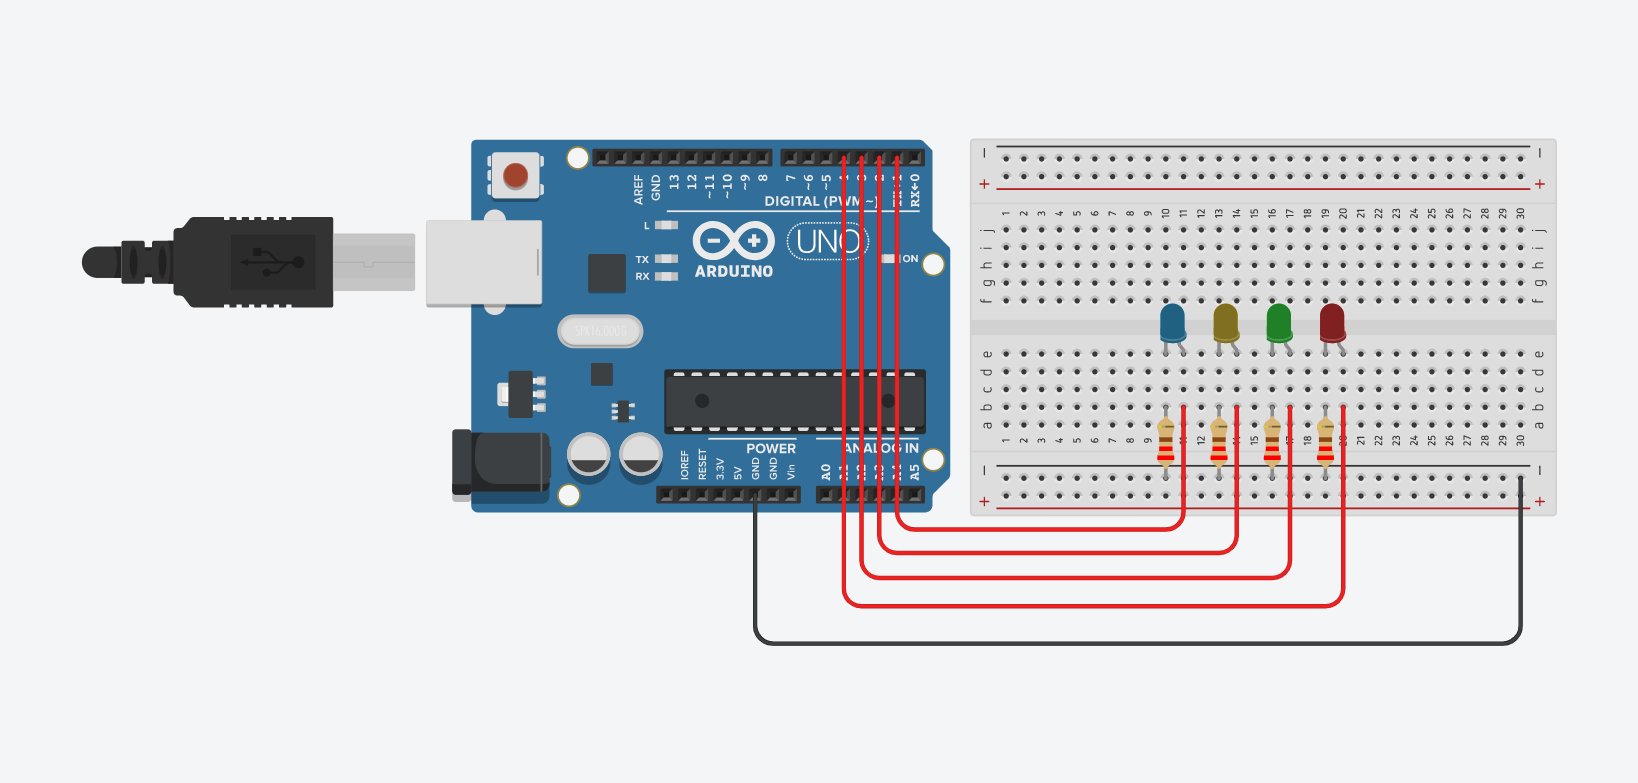
Arduino. I present a simple Arduino running lights project for beginners. This project uses four Light Emitting Diodes to display a to and fro pattern of LEDs. The first code produces a sweeping effect while the second code is for the Arduino running LEDs. You will require the following apparatus: 1 x Arduino Uno. 4 x LEDs. 4 x 1k ohm resistors.
Arduino LED Blinking Complete Tutorial Circuit Geeks
Get Started with Arduino LED Projects: Step-by-step tutorial for creating the classic blinking LED project. Learn Arduino coding and circuit connections.. An LED, which stands for Light-Emitting Diode, is a small electronic component that's a bit like a lightbulb, but is more efficient and requires a lower voltage to operate..

running led lights circuit using 555ic YouTube
For those of you who are just getting started with Arduino and are new to the program, this is the perfect tutorial. Here we will try to turn on 5 LEDs in turn. So it will look like the led is running. At first LED 1 is on, otherwise it is off. Second, the 2nd LED is on, otherwise it is off. Third, the 3rd LED is on, otherwise it is off and so on.