ESP8266 for IoT A Complete Guide
Untuk secara fungsi hampir sama tetapi perbedaannya terletak pada pin GPIO (General Purpose Input Output) pada masing - masing tipe. Berikut beberapa tipe dari keluarga ESP8266 antara lain : Gambar Keluarga Module ESP8266. Pada tutorial kali ini akan dibahas tentang modul ESP-01 untuk mengontrol LED melalui internet secara sederhana.
ESP8266 pinout reference and how to use GPIO pins
Dukungan Fungsi NodeMCU ESP8266. NodeMCU ESP8266 adalah sebuah board pengembangan IoT (Internet of Things) yang didasarkan pada chip Wi-Fi ESP8266. Board ini memungkinkan pengguna untuk mengembangkan dan memprogram perangkat-perangkat IoT dengan menggunakan bahasa pemrograman Lua atau Arduino IDE.
Programming ESP8266 With Arduino IDE The Easy Wayelab Rik
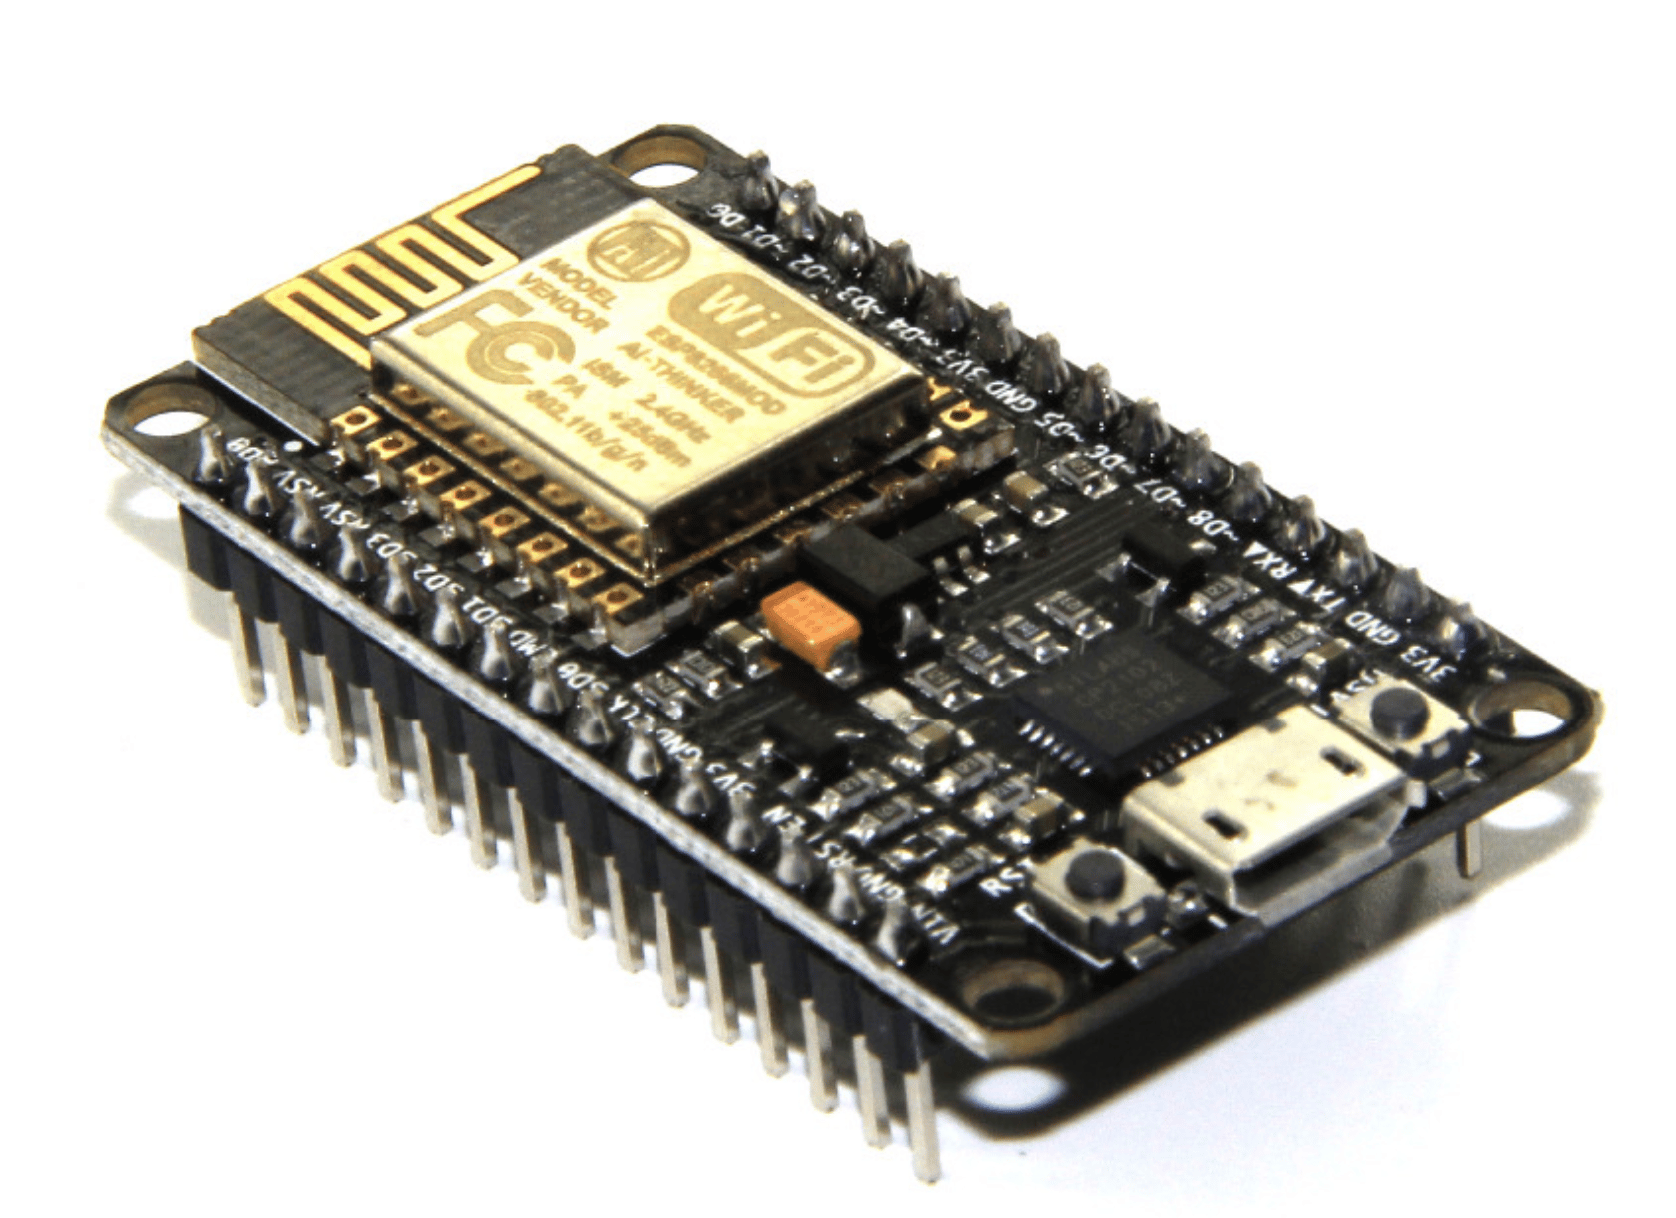
An ESP8266 Wi-Fi module is a SOC microchip mainly used for the development of end-point IoT ( Internet of things) applications. It is referred to as a standalone wireless transceiver, available at a very low price. It is used to enable the internet connection to various applications of embedded systems. ESP8266 Wi-Fi Module.

Apa yang Dimaksud dengan NodeMCU ESP8266
Modul ESP 8266 adalah modul wifi yang memiliki fungsi sebagai perangkat tambahan mikrokontroler seperti Arduino agar dapat terhubung langsung dengan Wireless Fidelity (Wi-Fi) dan membuat koneksi dengan protokol TCP/IP. Untuk mengaktifkan modul ini membutuhkan voltase sebesar 3.3v. Dan memiliki tiga mode wifi yaitu daapt dijadikan sebagai.
Esp8266 nodemcu datasheet
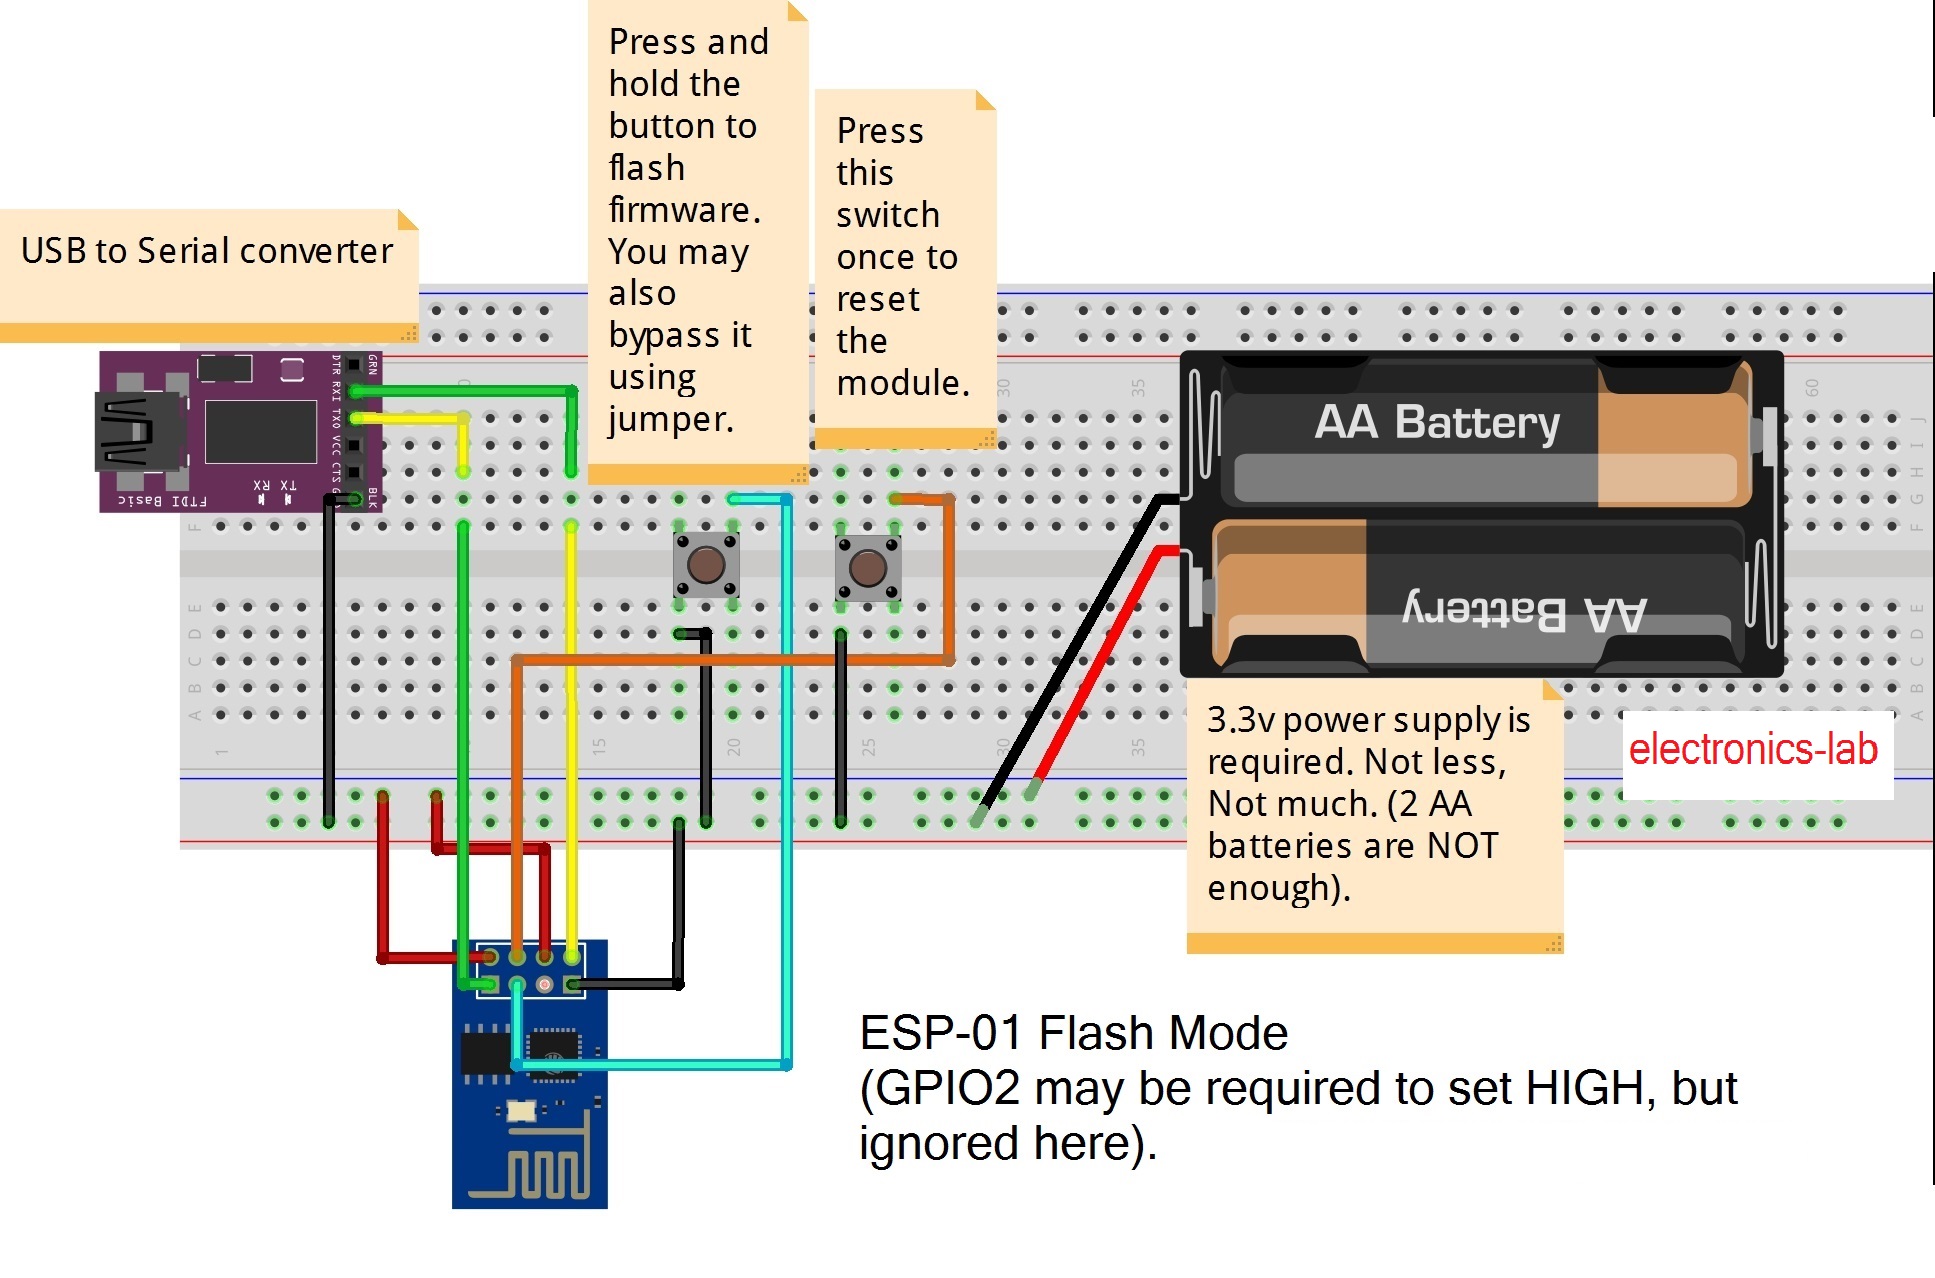
As it was already mentioned in the Getting Started with ESP8266 ESP-01 tutorial, the Wi-Fi module is fully programmable, allowing us to use it as a microcontroller and manipulate inputs and outputs. In this tutorial we are going to show how to program the ESP module via Arduino UNO to blink an LED and control it from a wireless device.
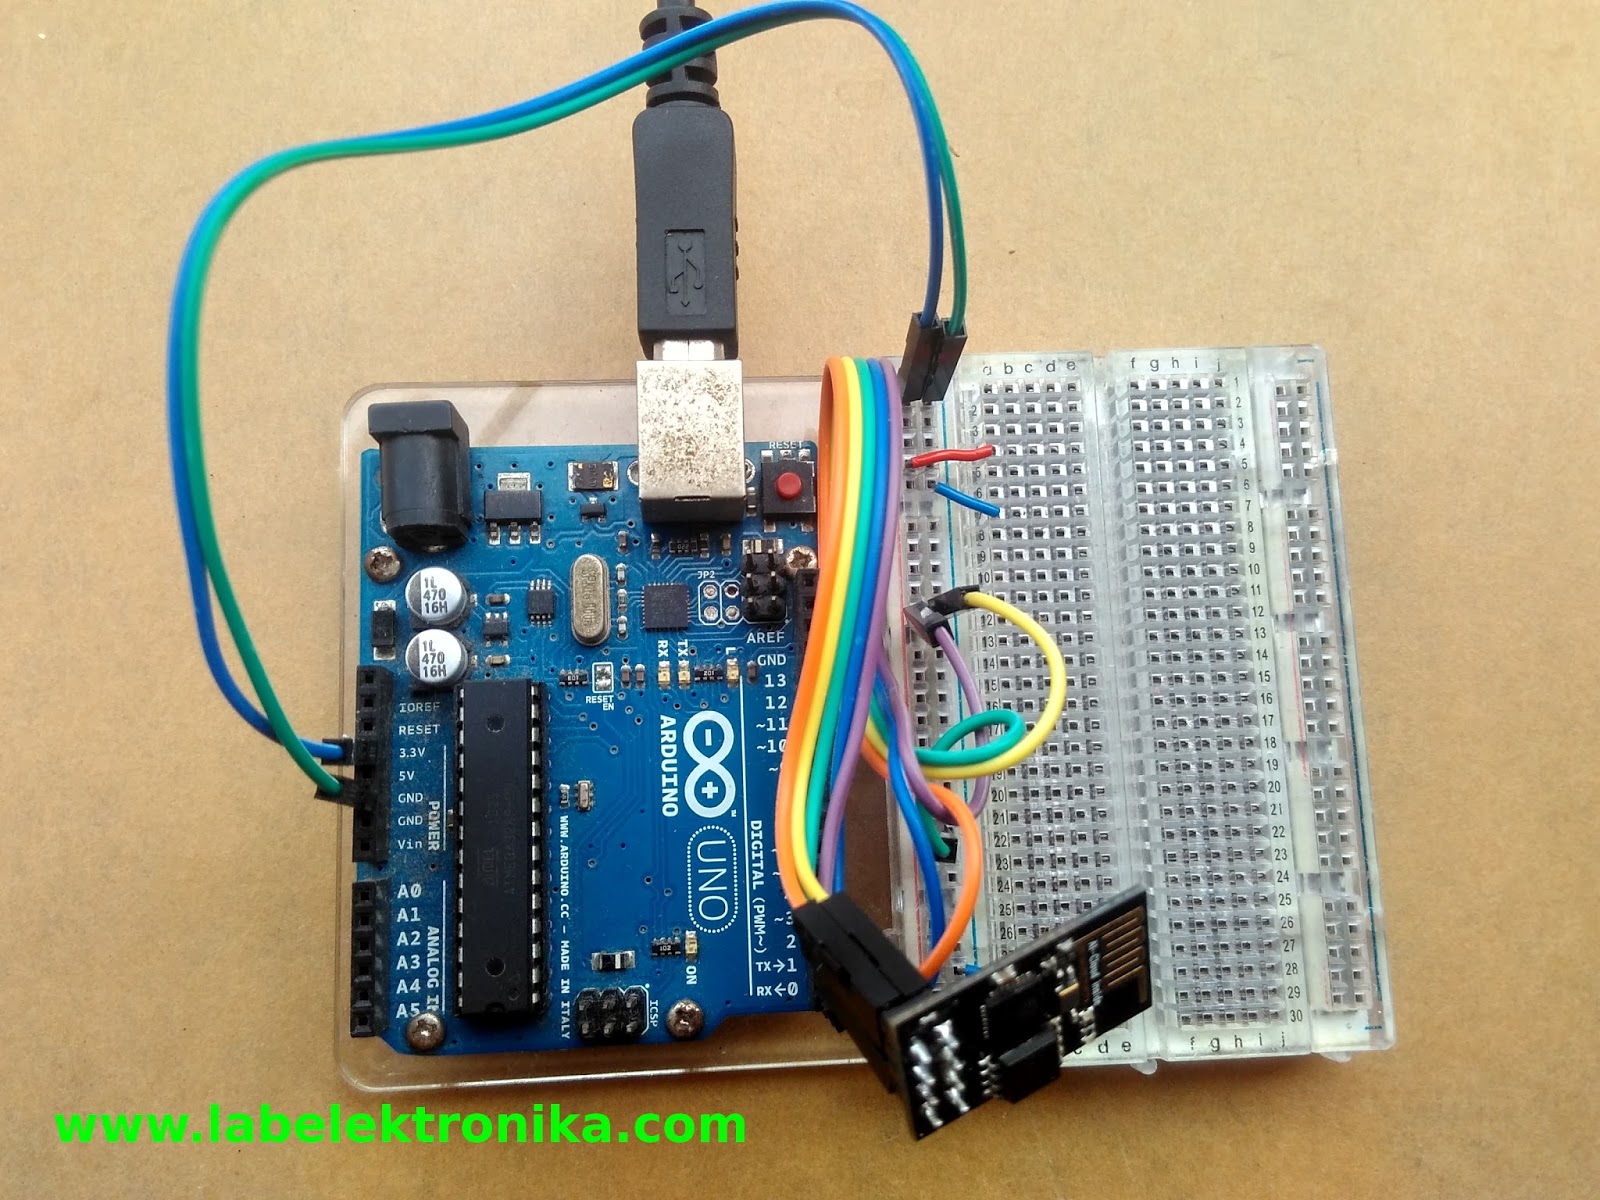
TUTORIAL KONFIGURASI WIFI MODULE ESP8266 ESP01 DENGAN ARDUINO LAB ELEKTRONIKA
Using relays with the ESP8266 is a great way to control AC household appliances remotely. You can also read our other Guide to control a Relay Module with ESP32. Controlling a relay with the ESP8266 is as easy controlling any other output, you just need to send HIGH and LOW signals as you would do to control an LED.

Arsitektur NodeMCU ESP8266 GPIO TUTORIAL OKEGURU
Tutorial ESP8266 (ESP-01): Pertemuan Pertama. Oleh Tedy Tri Saputro pada 2 Apr 2017. Pada tulisan sebelumnya, embeddednesia pernah membahas mengenai bagaimana caranya menghubungkan Arduino dengan Jaringan Internet/Wifi Lokal menggunakan shield Arduino berbasis ESP8266. Nah, dalam kesempatan kali ini, embeddednesia akan membahas mengenai apa sih.

GPIO pins of ESP8266 and How to use efficiently IoTbyHVM
Introduction. The ESP8266 chip from Espressif is the new generation of low-cost WiFi chips after the TI CC3000/CC3200. This small chip not only integrates the whole WiFi features, but also a powerful programmable MCU. Depending on the board layout (ESP-01, ESP-03, ESP-07, ESP12, etc) it is attached to a programmable flash, ranging from 512K to 4M.
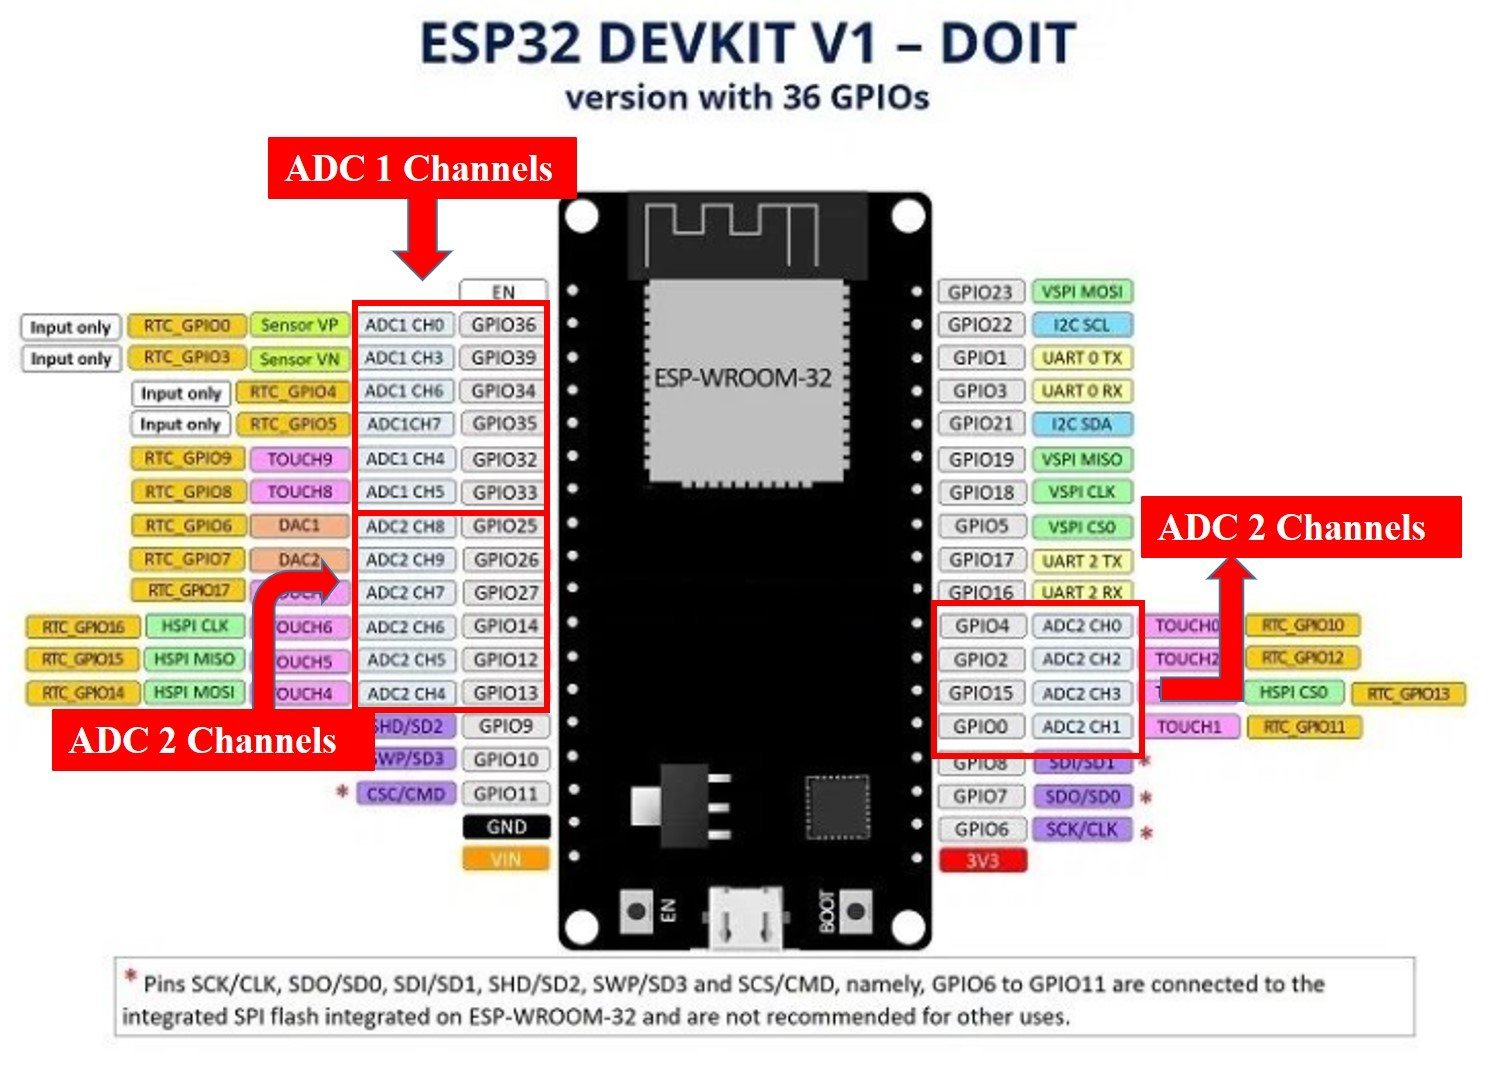
ESP32/ESP8266 ADC with MicroPython Measure Analog Readings
ESP8266 Timer and Ticker Example. January 2, 2018 ESP8266 ESP8266, ticker, timer. There are two timers in ESP8266 Timer0 and Timer1, one timer is used by its WiFi functions. We get only one timer to work. To avoid crash issues I recommend use of Ticker instead of Timer. Ticker performs same function as timer.
Esp8266 nodemcu datasheet
Esp8266: Solusi Mudah untuk Menghubungkan IoT ke Internet . Esp8266 adalah modul WiFi yang popular dan terjangkau untuk memungkinkan perangkat IoT terhubung ke internet. Meskipun berukuran kecil, namun memiliki fitur-fitur yang sangat bermanfaat bagi para pengembang IoT. Dalam artikel ini, kita akan membahas lebih dalam fungsi Esp8266. 1.
Esp12 Esp07 Esp8266 Flash Pinout Specs And Arduino Images Images
ESP8266 NodeMCU Control Digital Outputs. First you need set the GPIO you want to control as an OUTPUT. Use the pinMode () function as follows: pinMode(GPIO, OUTPUT); To control a digital output you just need to use the digitalWrite () function, that accepts as arguments, the GPIO (int number) you are referring to, and the state, either HIGH or LOW.

Tutorial ESP8266 NodeMCU Mengakses LCD TFT 1.8 ST7735
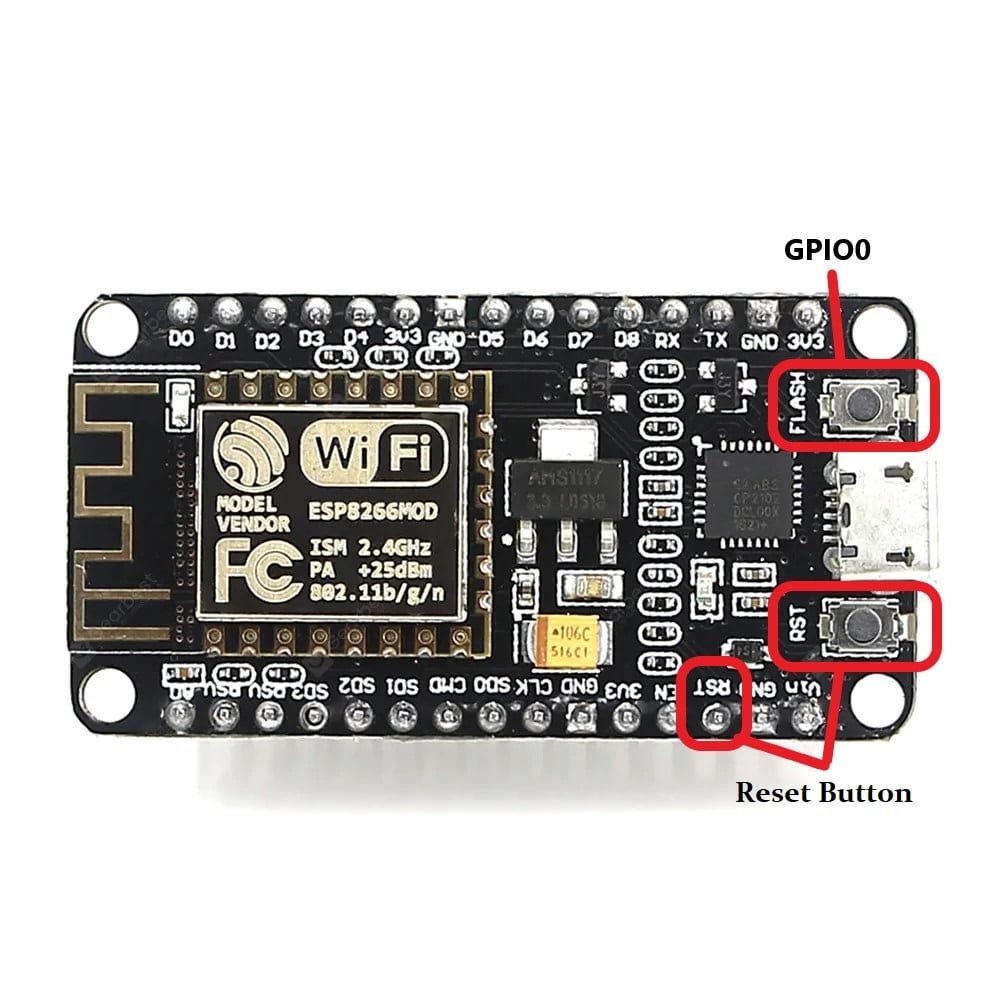
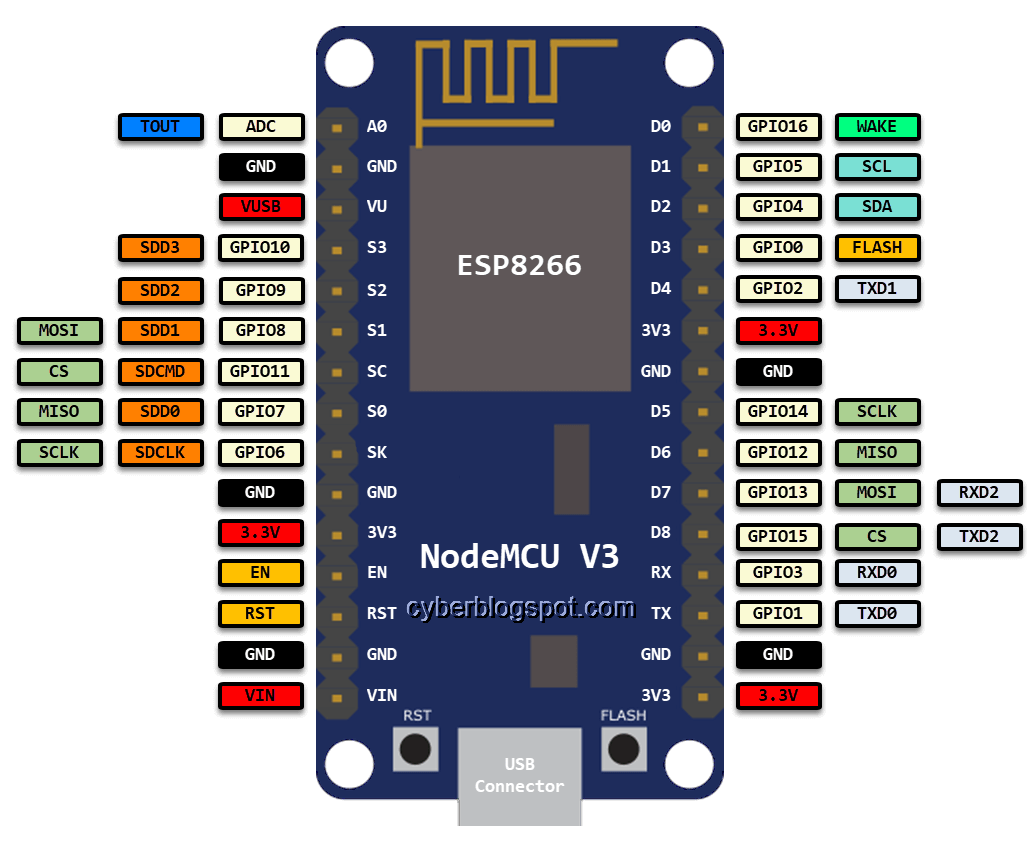
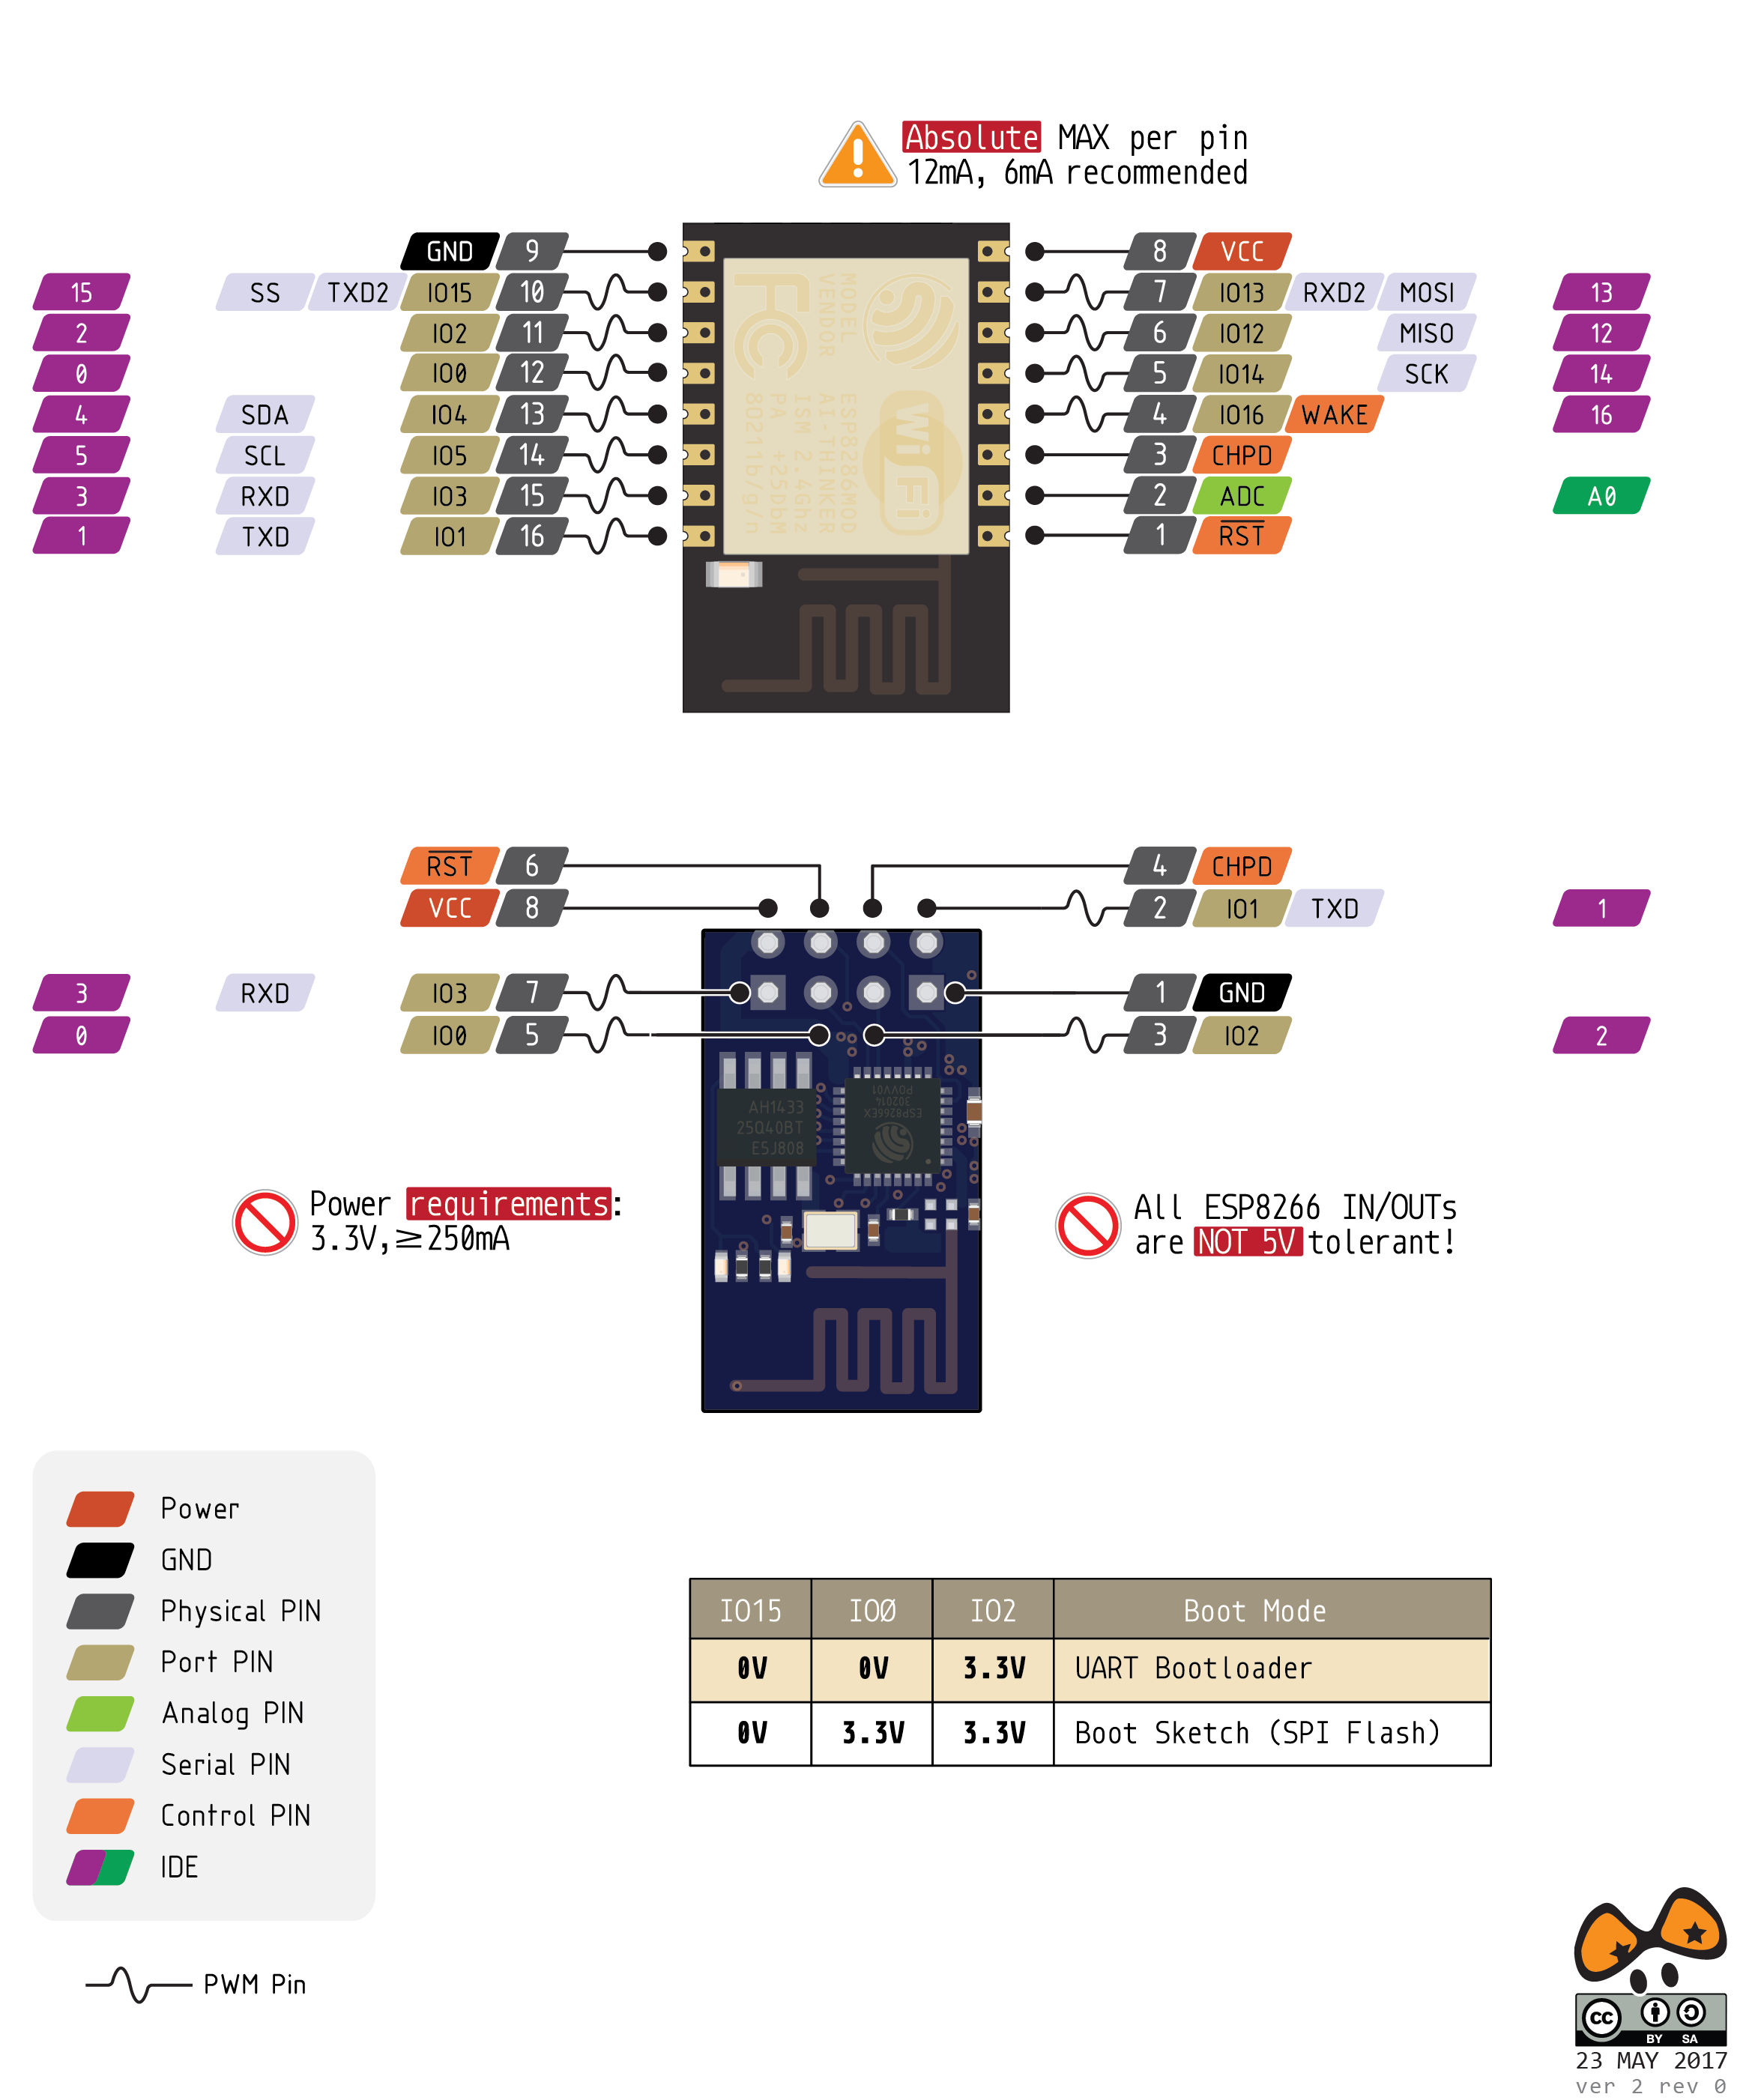
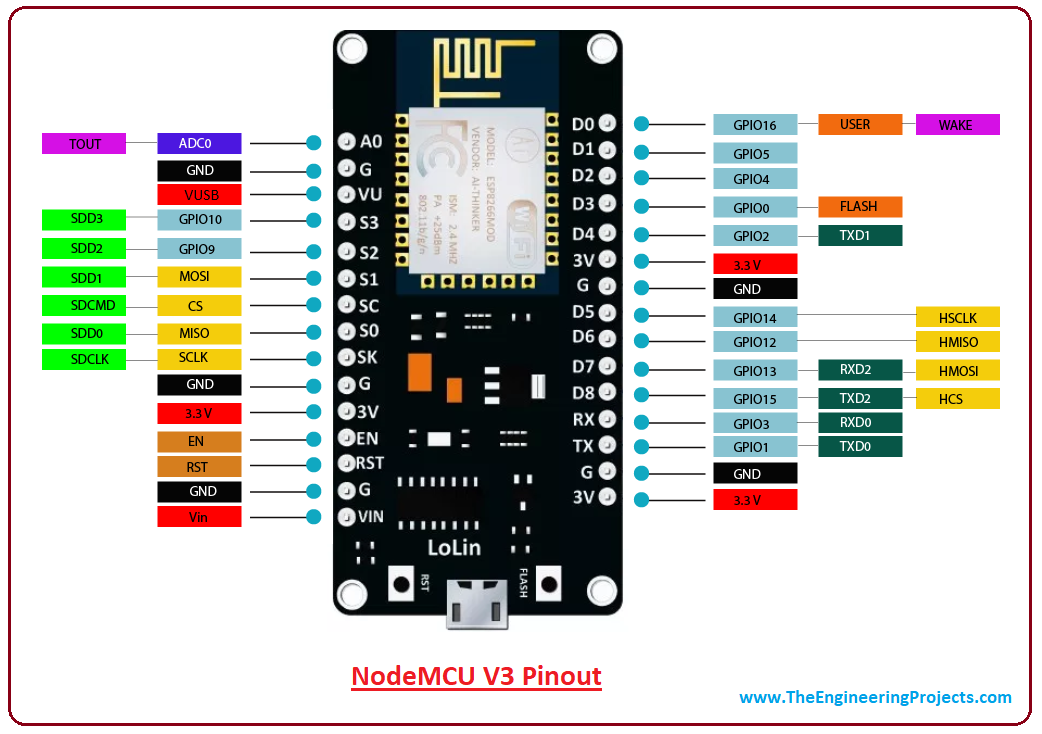
This article is a guide for the ESP8266 GPIOs: pinout diagrams, their functions and how to use them. The ESP8266 12-E chip comes with 17 GPIO pins. Not all GPIOs are exposed in all ESP8266 development boards, some GPIOs are not recommended to use, and others have very specific functions. With this guide, you'll learn how to properly use the.
Esp8266 nodemcu datasheet
But the benefit of ESP8266 is that you can use another processor as the 'main processing unit' and use the ESP8266 just as a Wi-Fi chip. ESP3266 Pinout. We will start understanding the pins of the ESP8266 with the main SoC itself. ESP8266 SoC is available in a 32-pin QFN Package (33 if you consider the center GND pad).
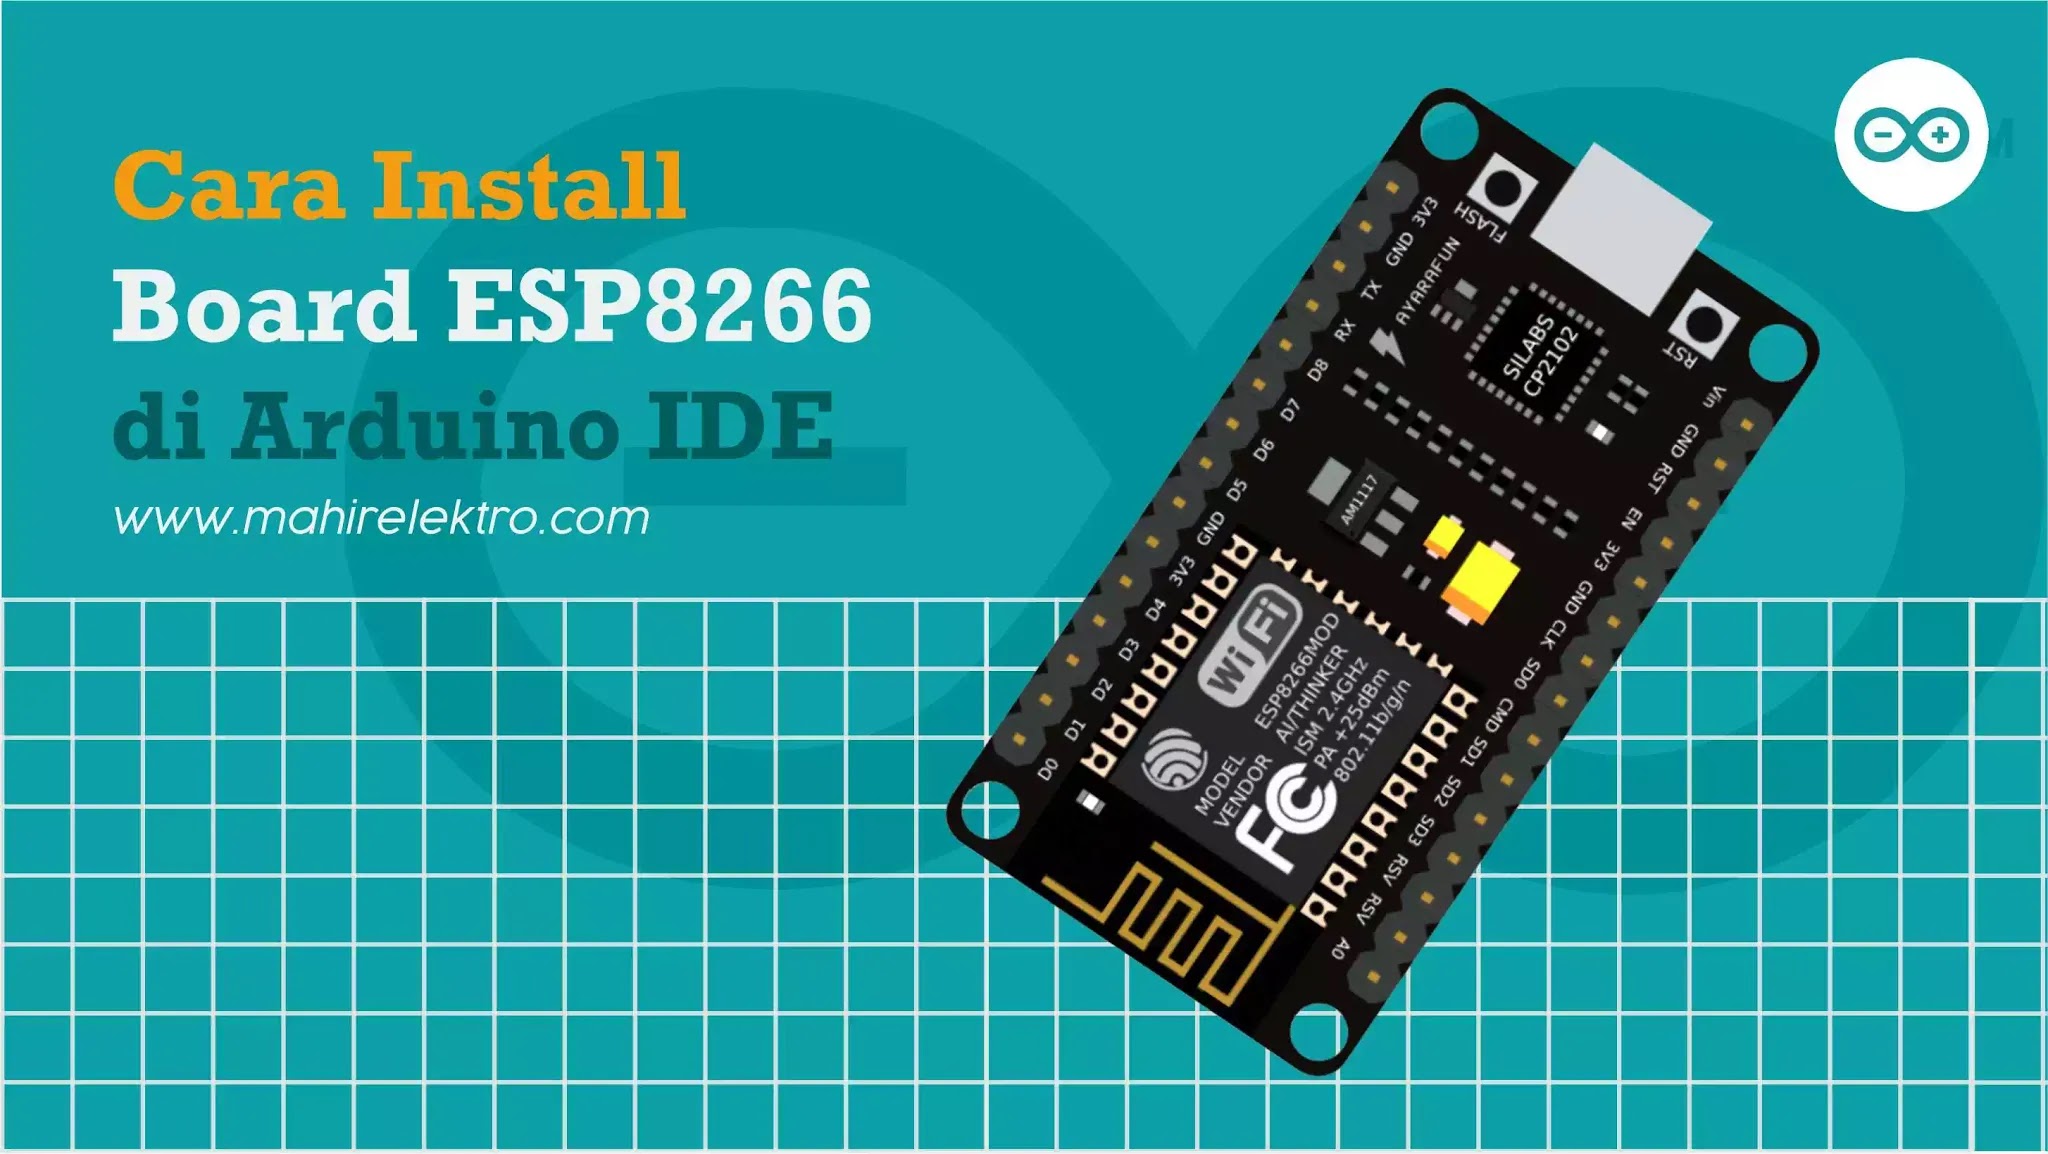
Cara Install Board ESP8266/NodeMCU di Arduino IDE Mahir Elektro
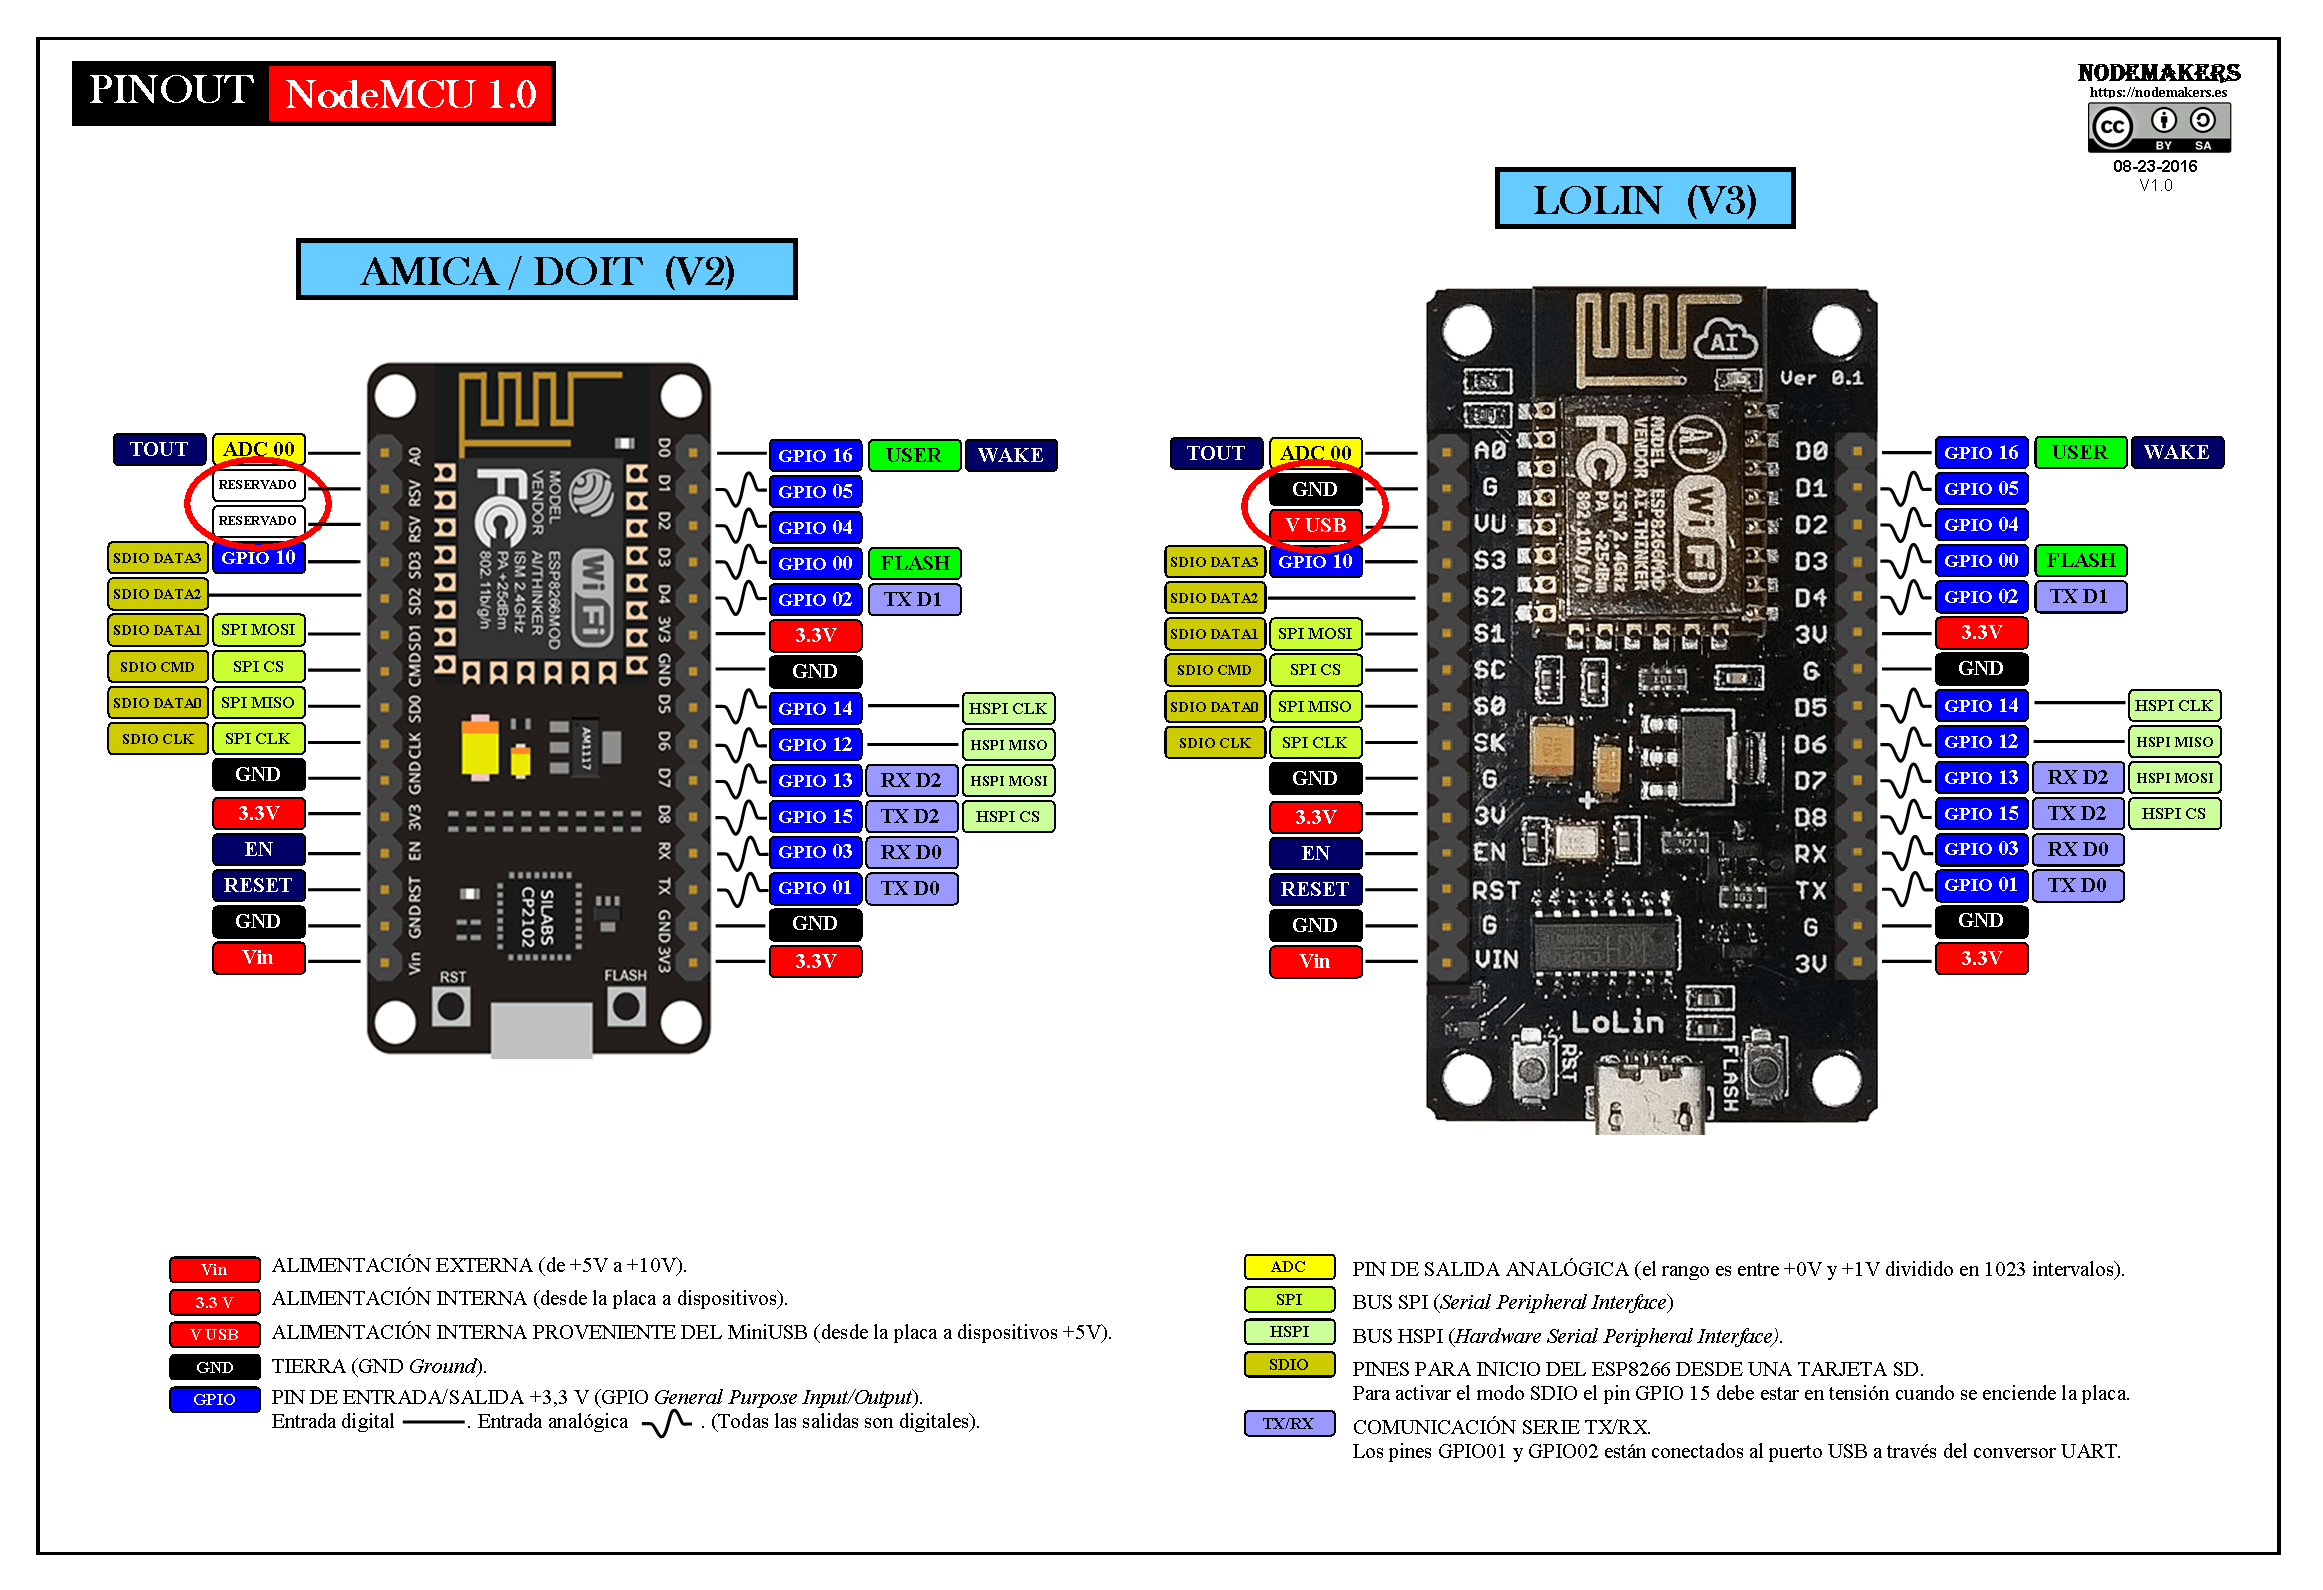
The NodeMCU ESP8266 development board comes with the ESP-12E module containing the ESP8266 chip having Tensilica Xtensa 32-bit LX106 RISC microprocessor. This microprocessor supports RTOS and operates at 80MHz to 160 MHz adjustable clock frequency. NodeMCU has 128 KB RAM and 4MB of Flash memory to store data and programs.

Como usar o NodeMCU ESP8266 com display Oled I2C Arduino e Cia
NodeMCU ESP8266 merupakan modul turunan pengembangan dari modul platform IoT (Internet of Things) keluarga ESP8266 tipe ESP-12. Modul ESP8266 dapat dipelajari dari artikel sebelumnya. Secara fungsi modul ini hampir menyerupai dengan platform modul arduino, tetapi yang membedakan yaitu dikhususkan untuk "Connected to Internet".

Esp8266 nodemcu datasheet
Untuk bentuk NodeMCU yang seperti itu, kamu memang memerlukan Shield, tapi bisa juga di coblosin ke Breadboard. Seperti penampakan dibawah ini: Baca Juga: [VIDEO] Cara OFFLINE Menambahkan Library Board ESP8266 ke Arduino IDE. ***. Btw Ada perbedaan Antara board NodeMCU dengan Arduino. Penting kamu ketahui karena akan berpengaruh pada Pemrograman.